Churro Cupcakes

j_stockton_20150826_0314

Photo by Jaime Stockton – http://www.jaimestocktonphotography.com

Well, this post is long overdue. And finally, here is a post about cupcakes on a cupcake blog. My friend Jaime and I had been talking about having a cupcake baking night since May. Finally, in August, we had that baking night and made churro cupcakes. Continue the three month delay trend, here is the post.

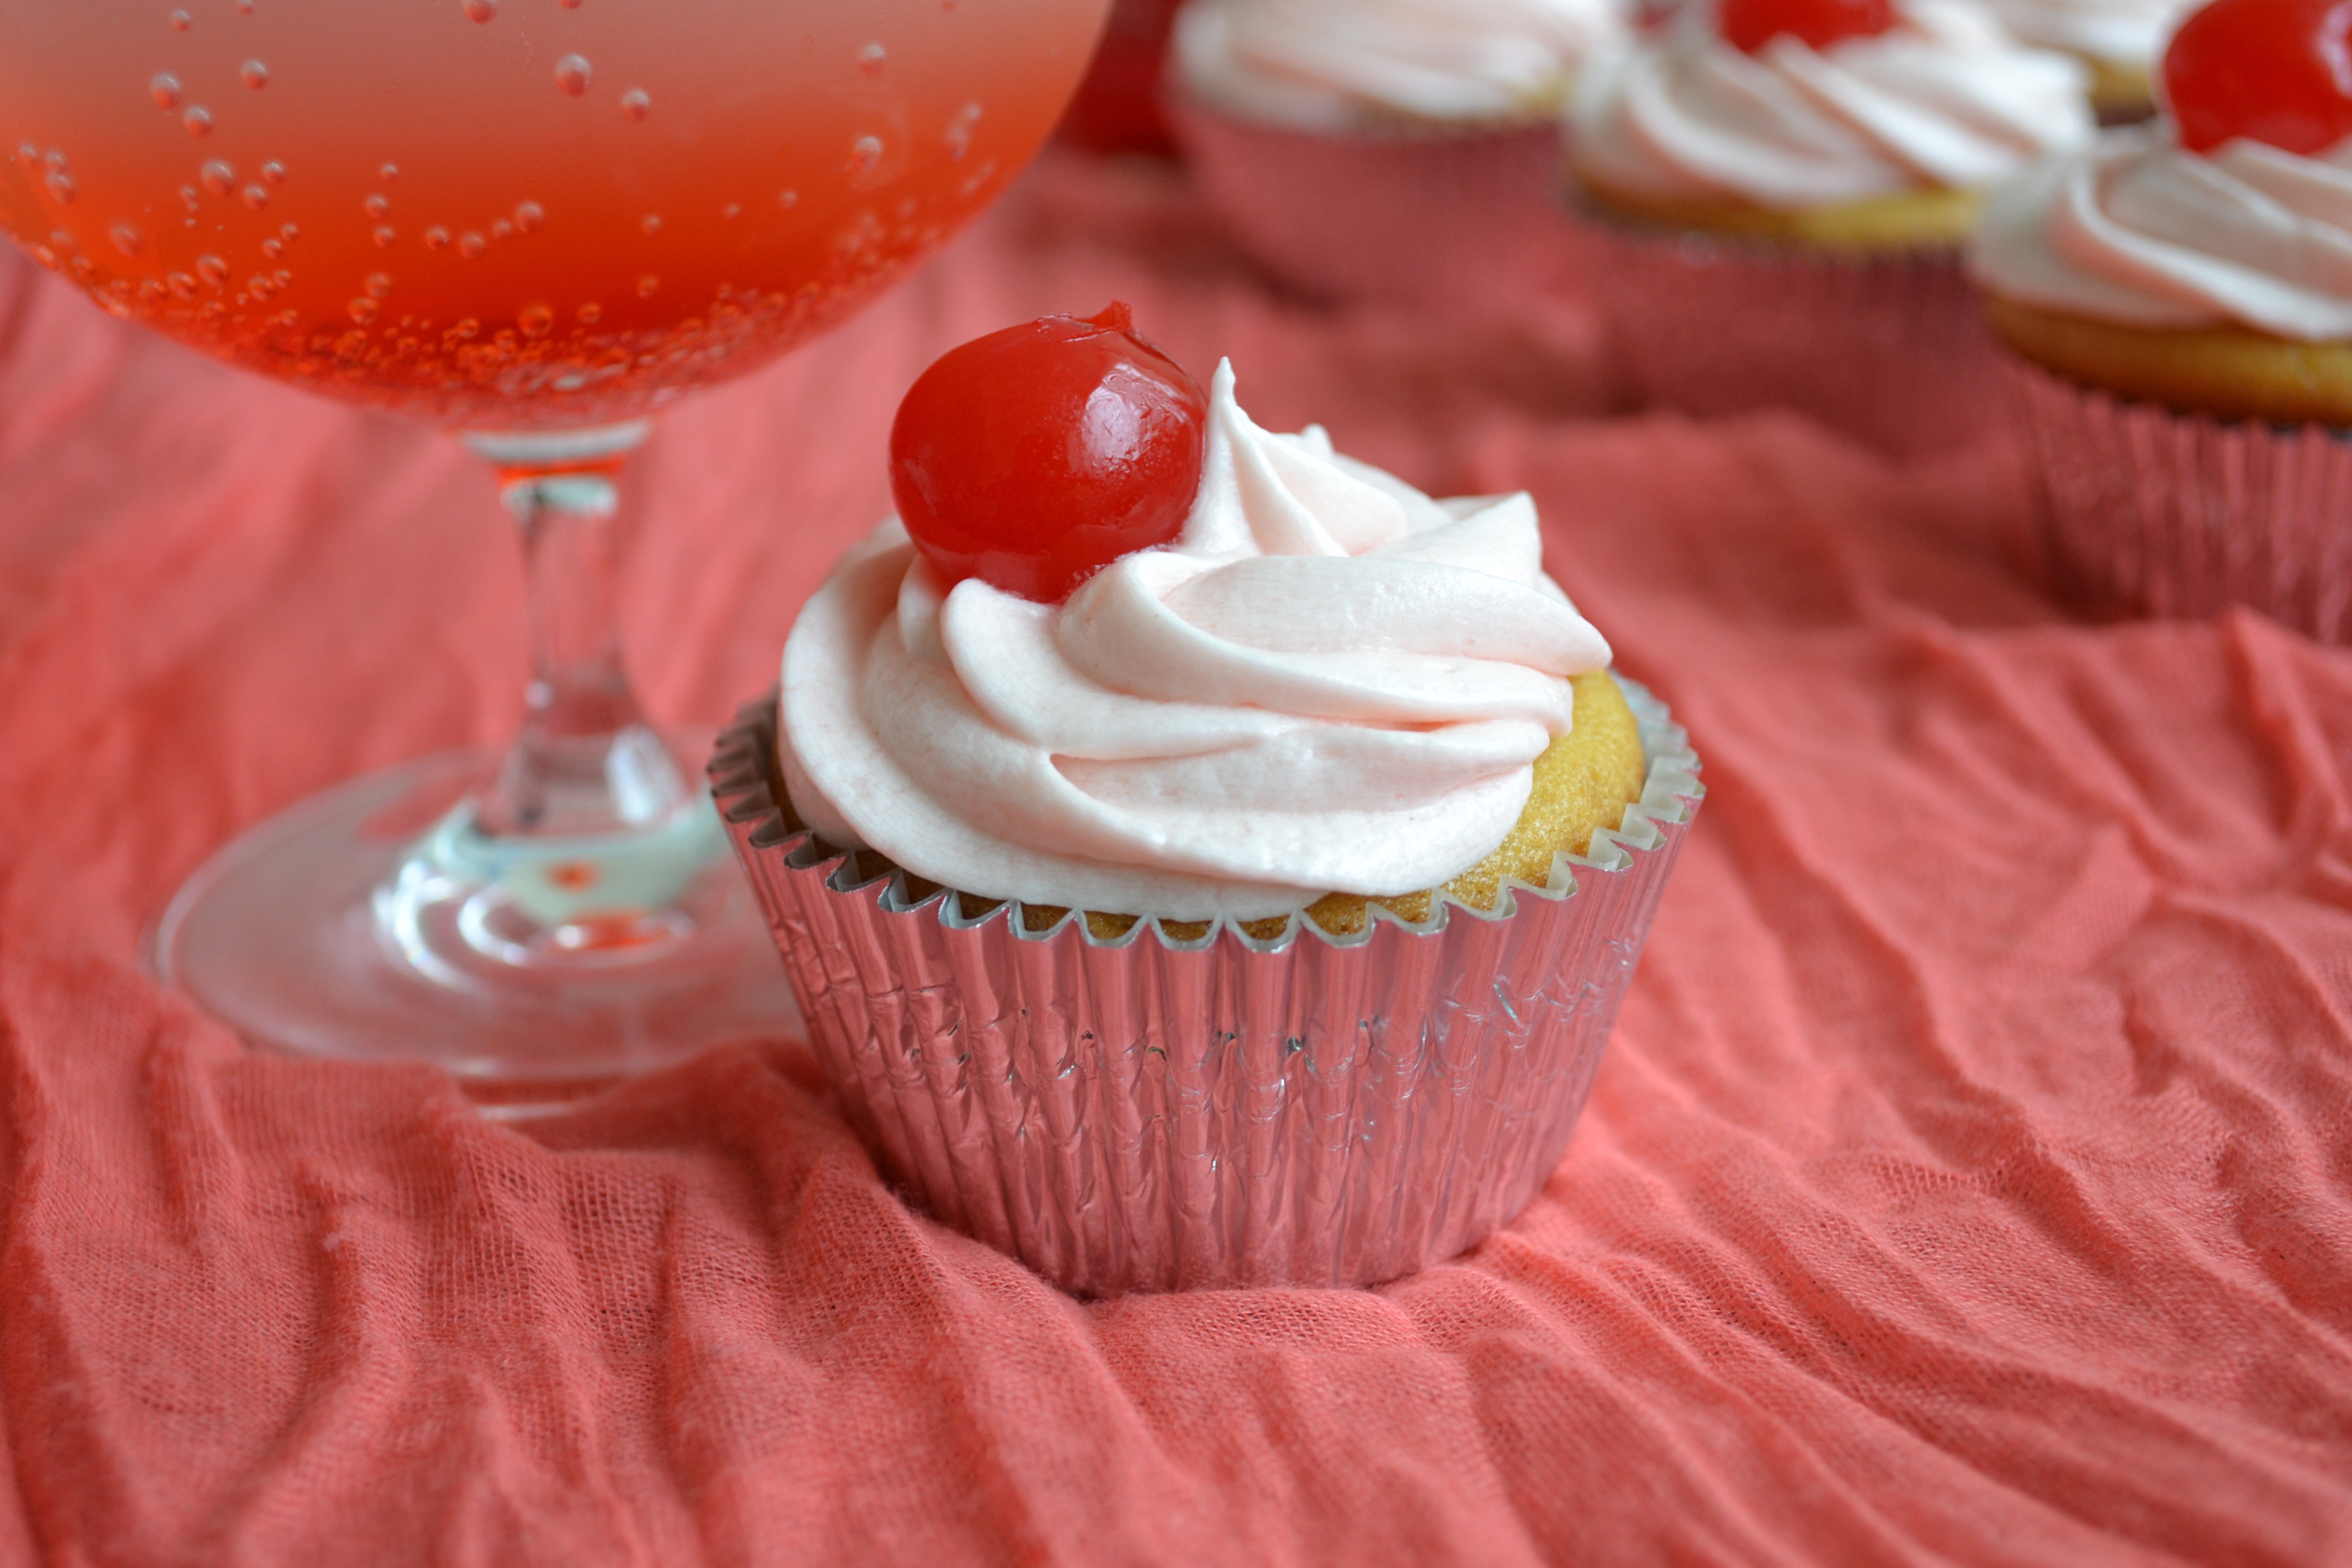
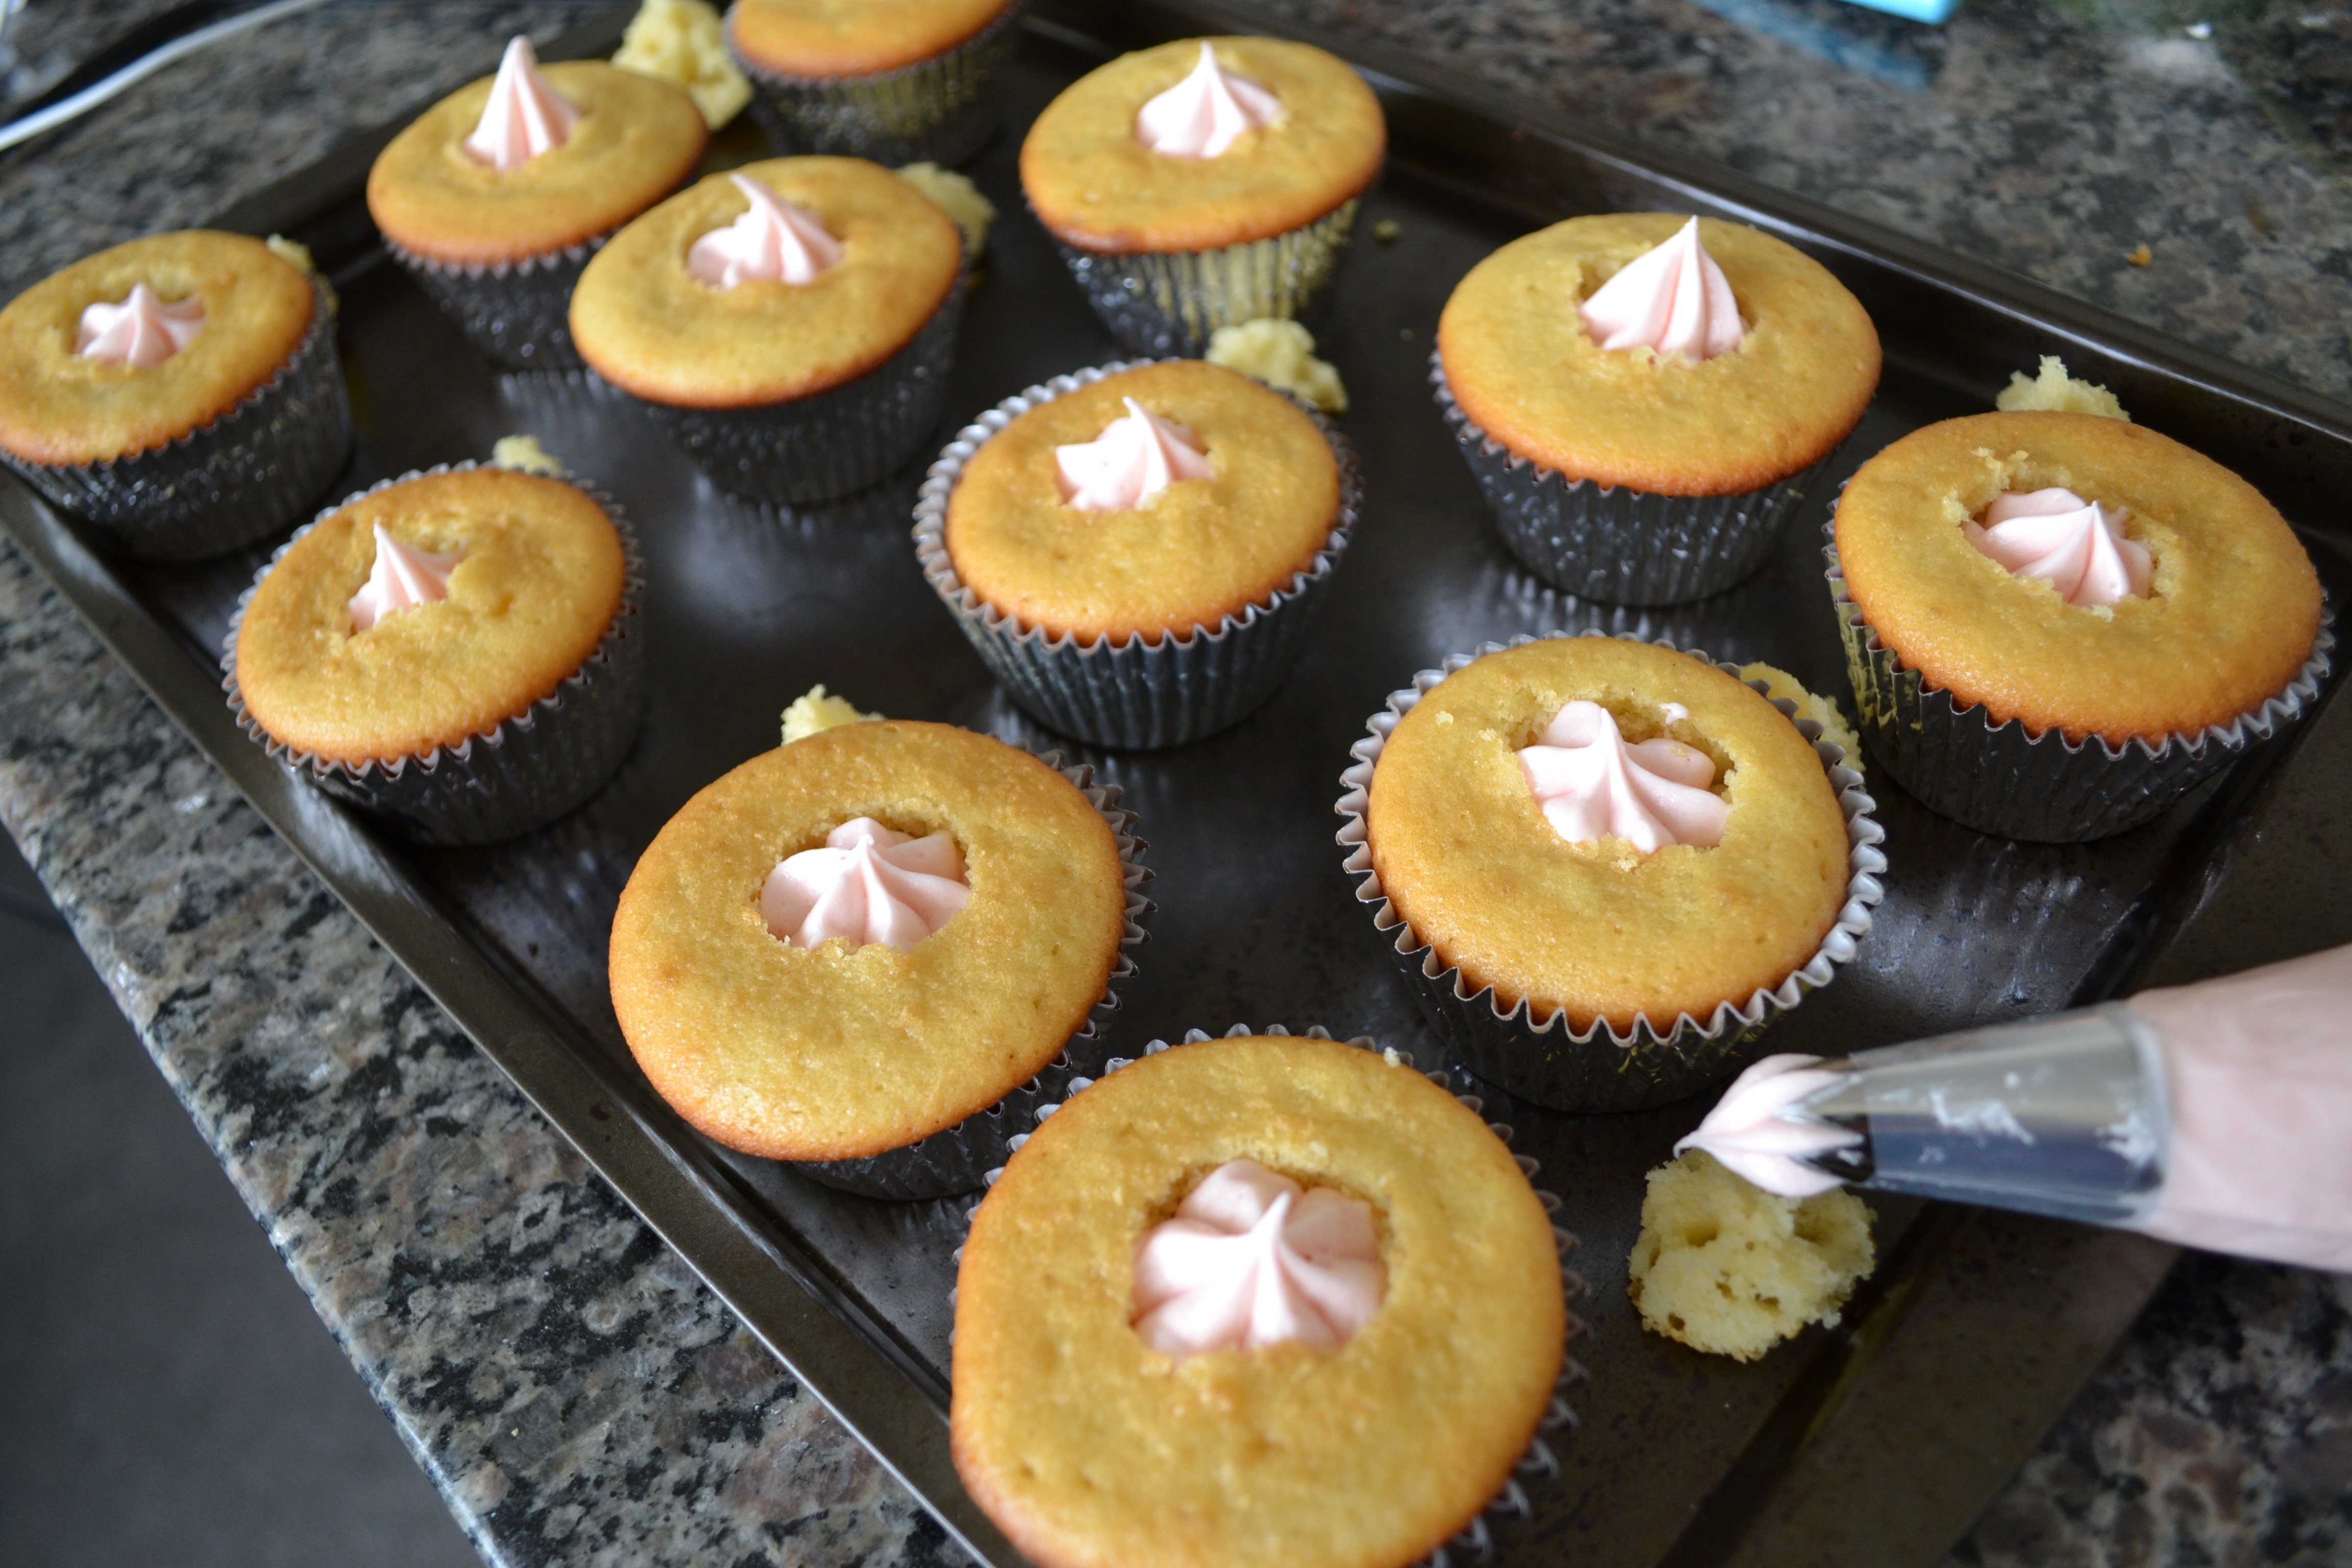
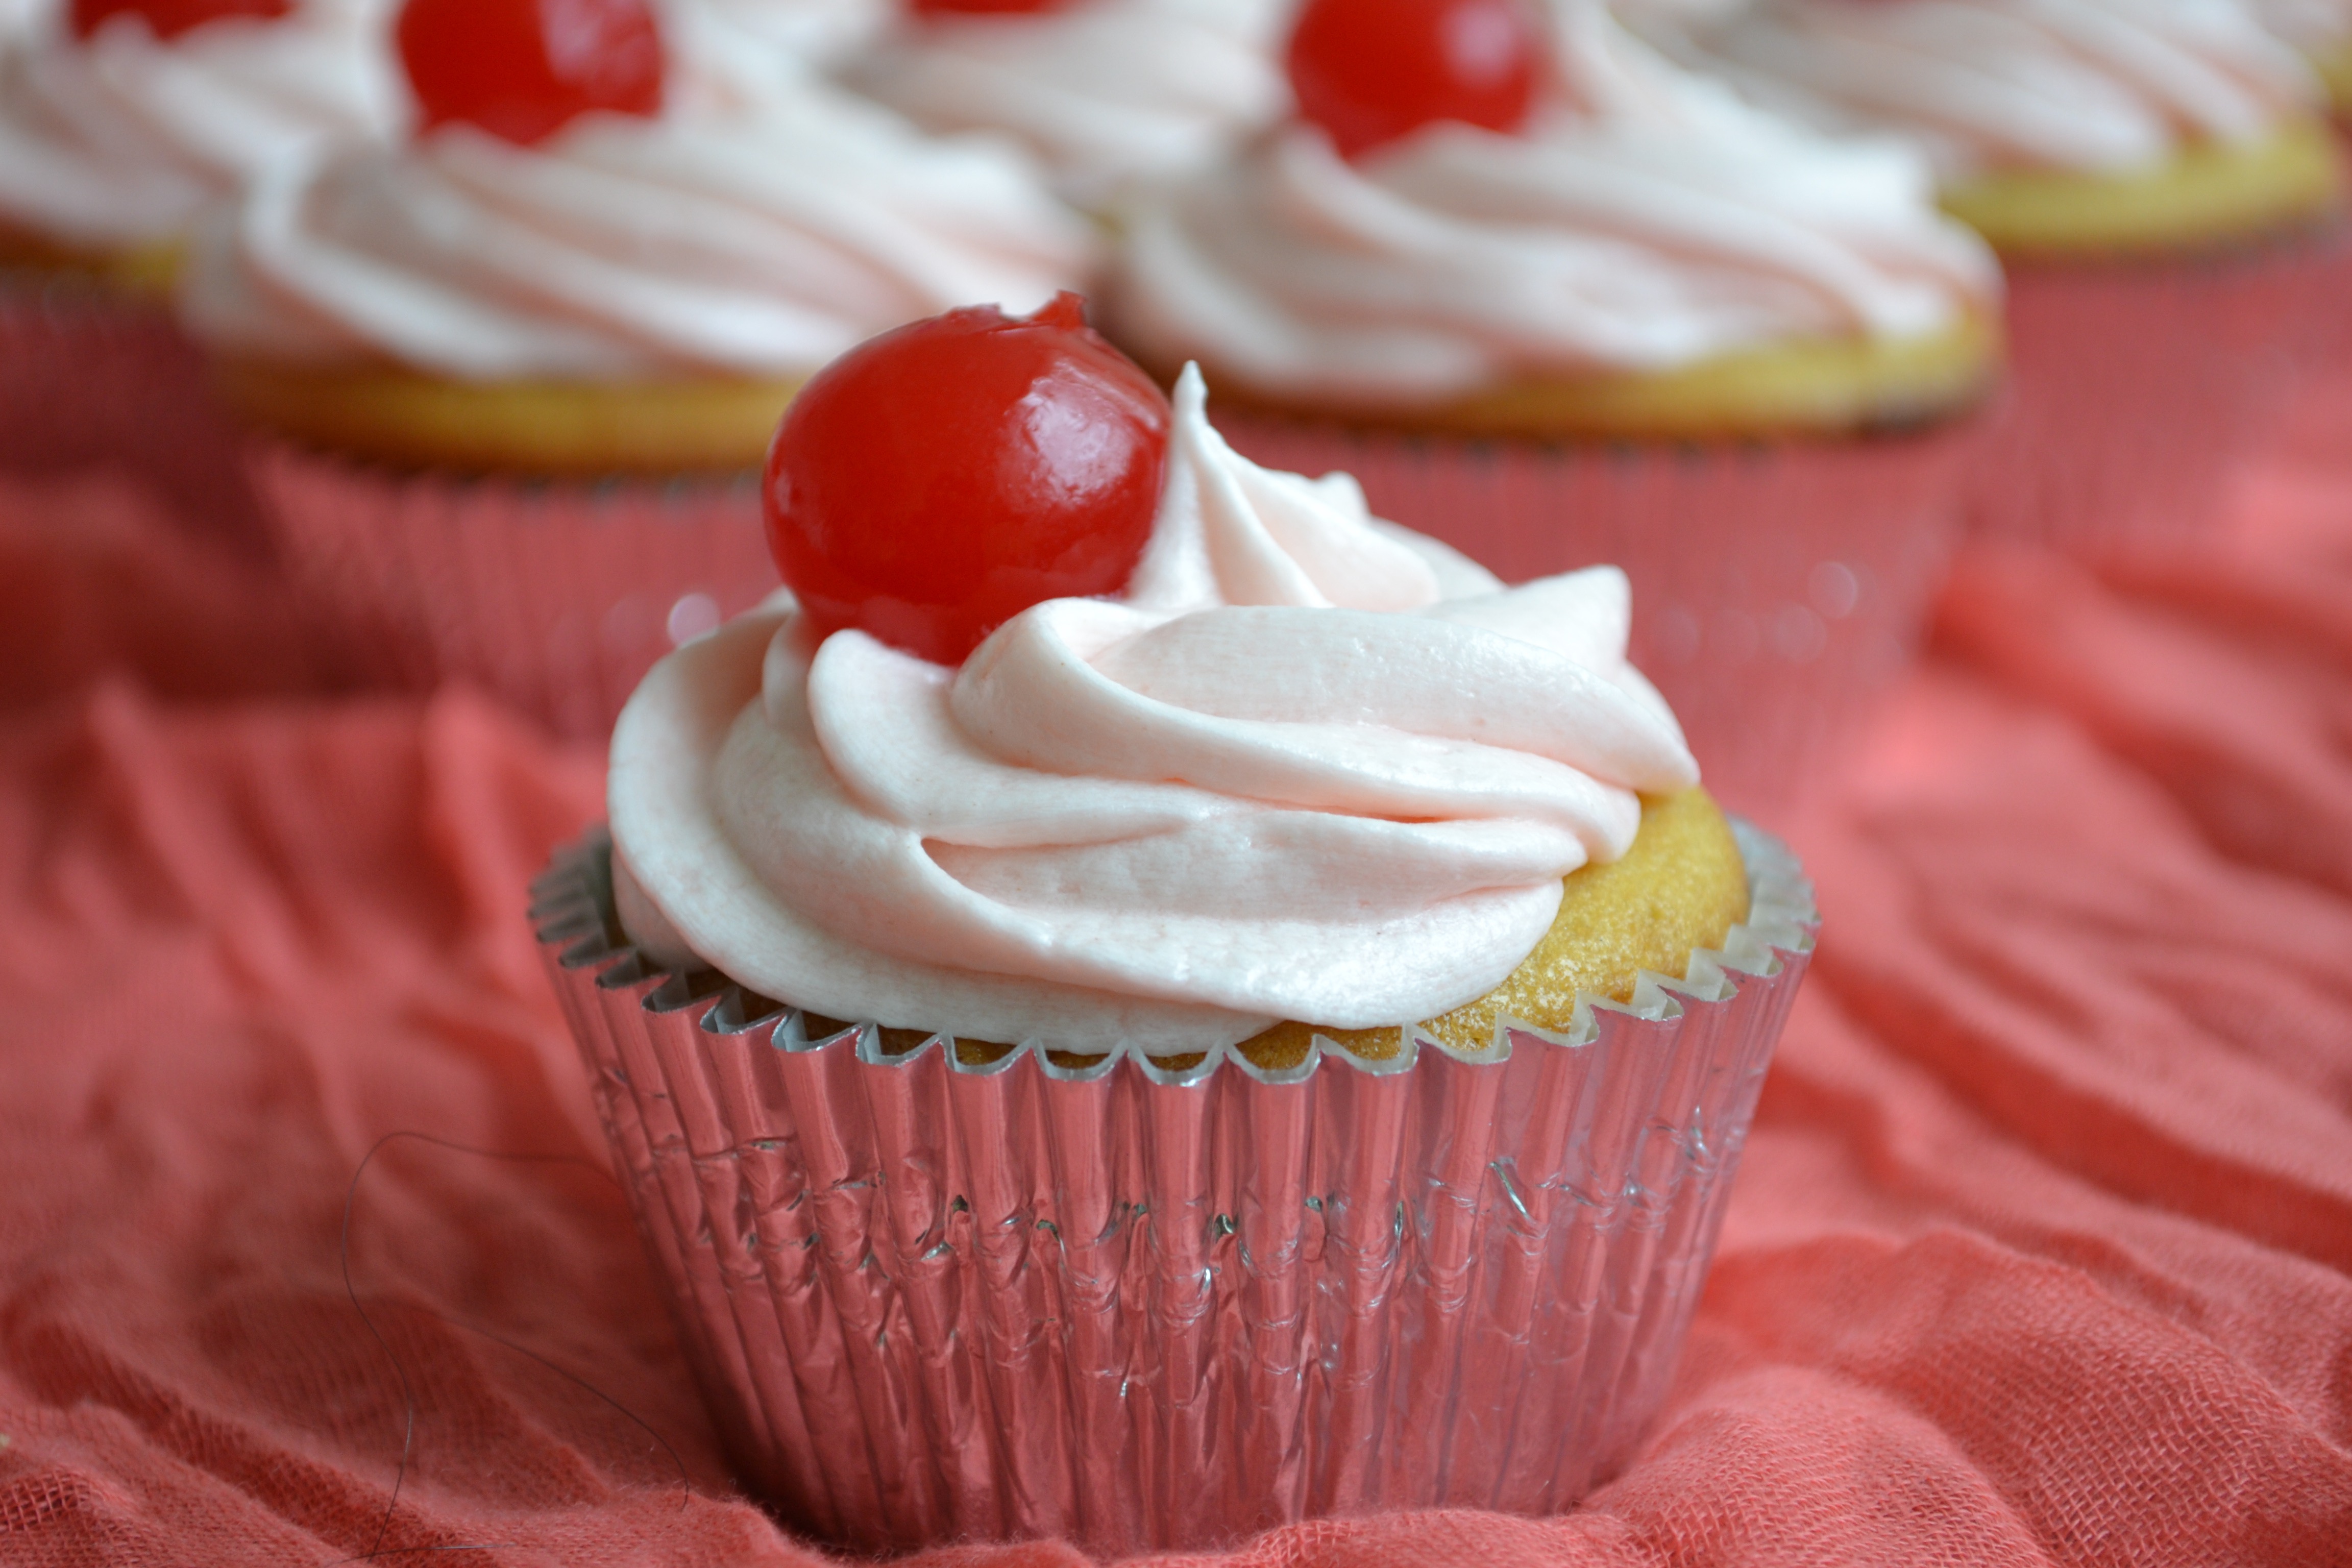
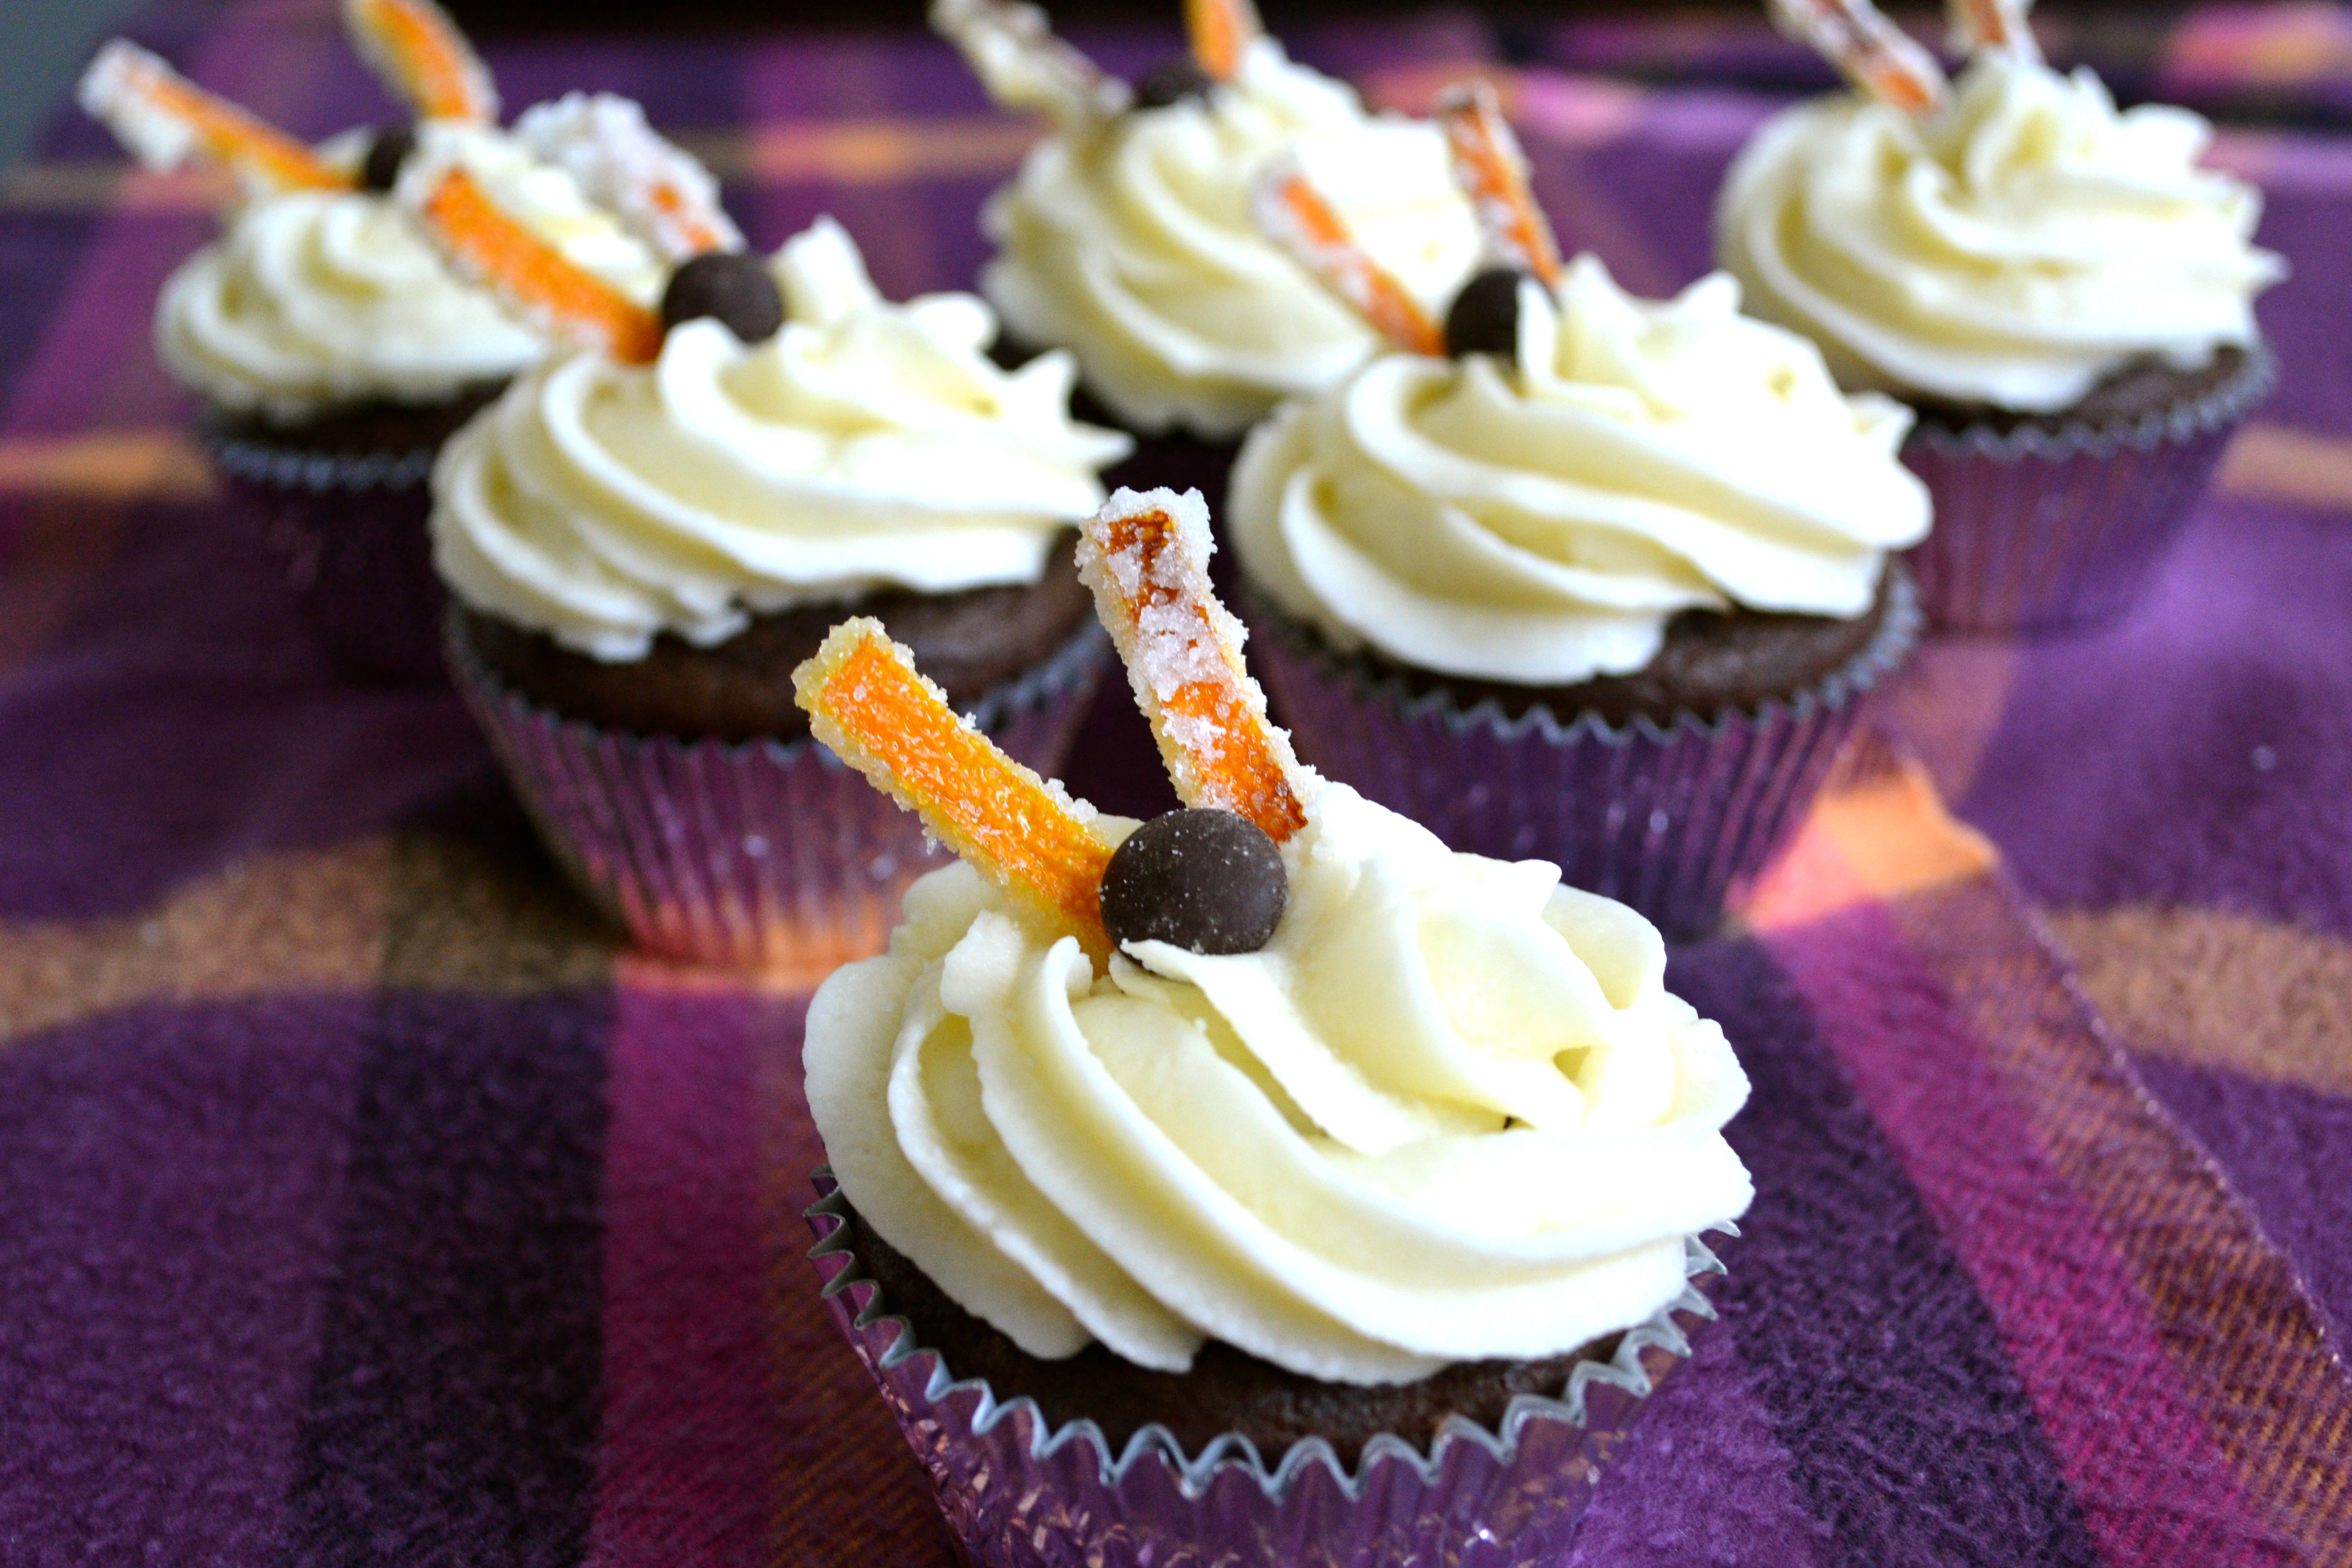
These cinnamon spiced vanilla cupcakes with a homemade churro topping were a hit. We made two dozen of them, and they were all gone within two hours of bringing them to work. It was a ton of fun making them, especially the churro topping. The cake is a cinnamon-spiced cake, and we decided to further spice it up with a hint of coffee extract. Wow, did that make a difference!

The churros first seemed a little daunting. You could use fry up some frozen churros, but fear not, homemade ones are super easy to make! All you have to do is mix a few ingredients and pipe it into a deep fryer (or a frying pan will suffice). You are supposed to pipe the dough into the oil using a piping bag to get the texture, but a scooping it in with a spoon works too. After they cool, load ’em up with some cinnamon sugar, and even some chocolate! Ooh, I wish we had some done that.What a sugar high that would be! Maybe next time…

Happy baking!

Xoxo,
JJC

Recipe

Cake, yield 12
1 1/2 cup all-purpose flour
1 teaspoon baking powder
1 teaspoon baking soda
1 teaspoon ground cinnamon
1/4 teaspoon salt
1 cup buttermilk
1/2 teaspoon coffee extract
1 teaspoon of vanilla extract
1/2 cup butter (1 stick), room temperature
3/4 cup sugar
2 eggs

1. In a small bowl, whisk together the flour, baking powder, baking soda, cinnamon and salt.
2. In a small bowl, combine the buttermilk, vanilla extract, and coffee extract.
3. In a large bowl, cream the butter and sugar until light and fluffy.
4. Add the eggs to the butter mixture at a time.
5. Add the flour mixture and the liquids alternately, beating well after each addition. Consistency should be similar to a pudding.
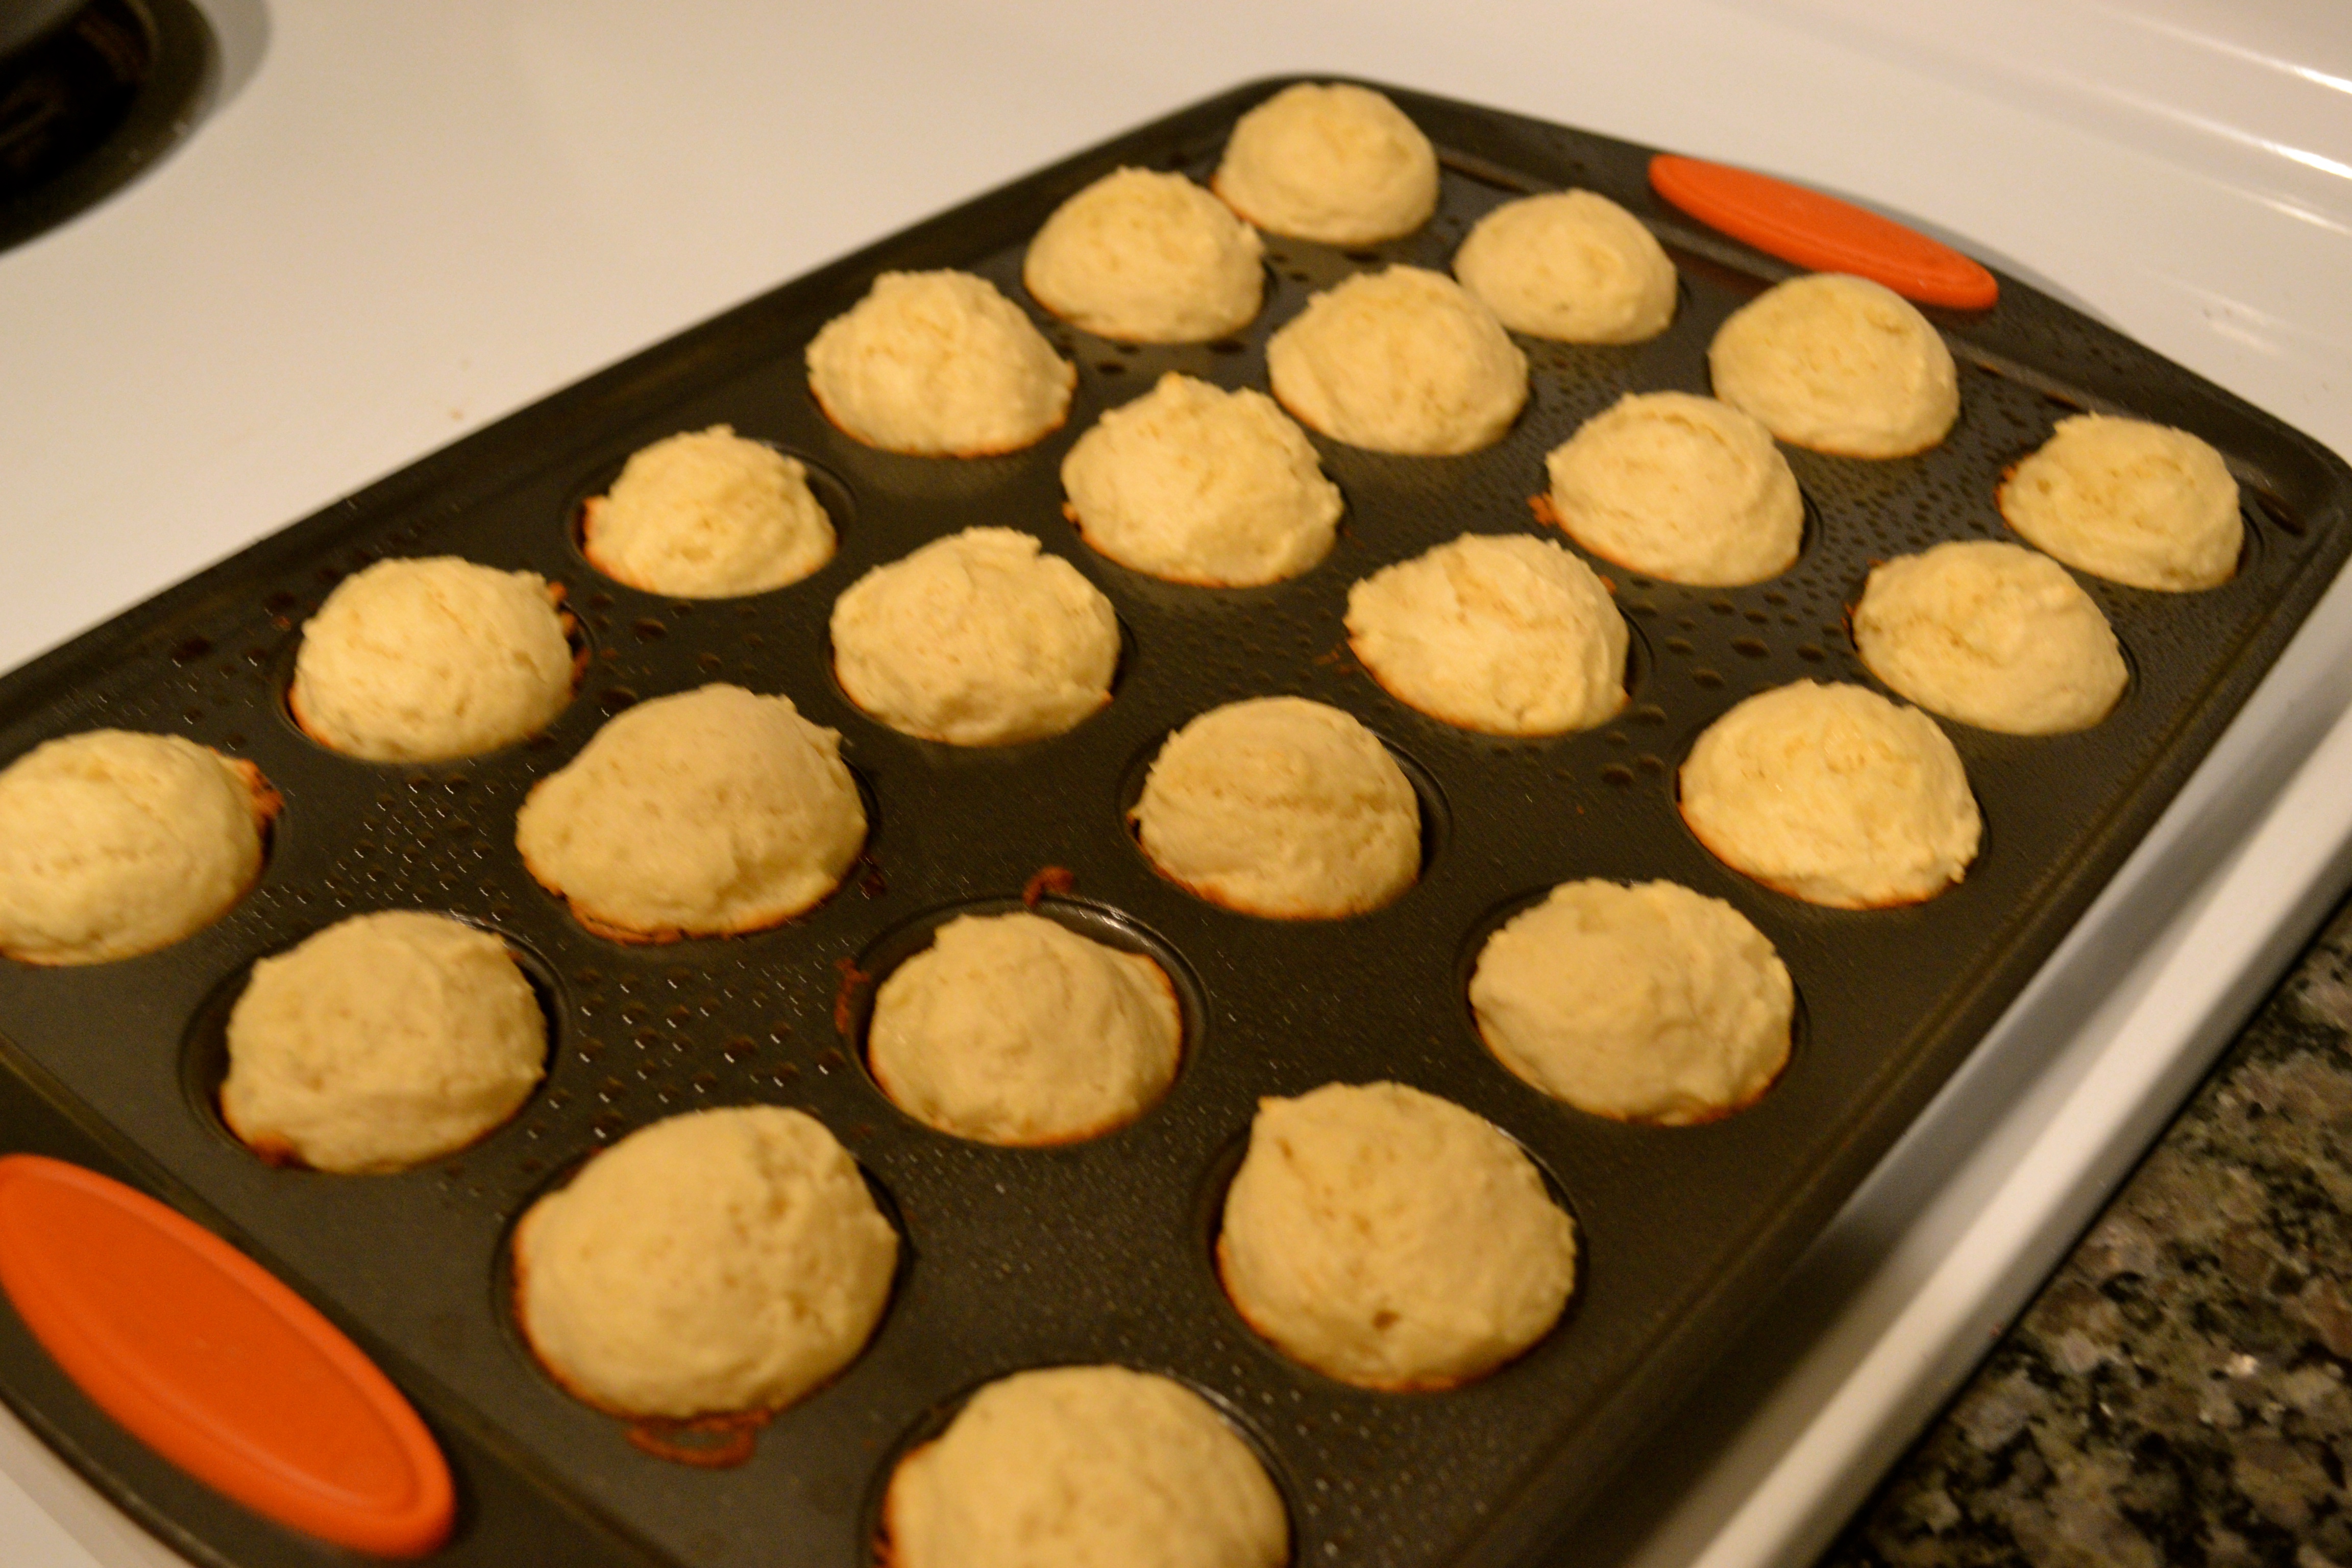
6. Fill the cupcake linings about 2/3 full
7. Bake the cakes at 325F for about 17-19 minutes or until a toothpick comes out clean.

Cinnamon Frosting
1/2 cup unsalted butter (1 stick)
1 teaspoon vanilla extract
1/2 teaspoon ground cinnamon
1/4 cup cream
3-4 cups confectioner’s sugar

1. Whip the butter until it is light and fluffy.
2. Mix in the liquids, cinnamon, and confectioner’s sugar until it is at a desired consistency.

Churro topping
1 cup water
2 1/2 tablespoons sugar
1/4 teaspoon salt
2 tablespoons vegetable oil
1 cup all-purpose flour
oil for frying
1/2 cup white sugar
1 teaspoon ground cinnamon

1. In a small saucepan over medium heat, combine the sugar, water, salt, and oil. Bring to a boil and remove from the heat. Then stir in the flour until it forms a ball.
2. Heat the frying oil and then pipe in the dough using a pastry bag.
*Note, we did spoonfuls of the dough without any issues.
3. Combine the cinnamon and the sugar to dip the churros in the mixture.

j_stockton_20150826_0316

Photo by Jaime Stockton – http://www.jaimestocktonphotography.com

Apple Cider Mimosas Special

DSC_1572

For every Thanksgiving feast, I always make desserts (surprise, surprise). I last posted about the triple chocolate cake pops. What I didn’t tell you was that I took off from work to spend the day baking. And what makes holiday baking even better? A glass (or two) of an apple cider mimosa. What else are you going to do when you are waiting for the cake to cool other than sip on this easy to make tasty beverage?

What you need:
– apple cider
– sparkling wine

Optional:
– caramel topping
– cinnamon sugar

1. Dip the rim of your glass in the caramel sauce (or water).
2. Dip the rim of the glass into the cinnamon sugar.
3. Pour in a glass 1 part sparkling wine to 1 part apple cider.

Triple Chocolate Cake Pops

DSC_1575.jpg

For this Thanksgiving, I bring you a cake pop special. I feel that I had to brag, I mean post, about these cake pops because it is a personal victory. To understand this, we have to go back to October, when my friend Jaime and decided to make cake pops for Halloween. They should be pretty simple, right? Make a cake and mix it with frosting. Then roll it up into a ball and coat with candy. But, we were riding the struggle bus all that night. Our plan was to make pumpkin spice cake, but we almost forgot to add the pumpkin and the spice. Oops. The worst, however, was melting the candy melt in the microwave and grabbing the bowl that had been in the microwave for 5+ minutes. Three second-degree burned fingers resulted in a run to the store at 10:30pm to get burn relief medicine, and a difficult next few days trying to type anything. In all seriousness, use caution in the kitchen!

This time around, I decided to make triple chocolate cake pops. This is a chocolate cake mixed with chocolate frosting, coated with a chocolate candy melt. It’s basically paradise for a chocolaholic. Using the lessons learned from the past, the cake pops came out to be a (super) success, if I do say so myself. Key lessons for cake pops:

  • The cake doesn’t have to perfect. You are going to mash it up and mix it with frosting.
  • To avoid the burned fingers, I got a Wilton Candy and Chocolate Melt Melting Pot. This melting pot is great because one setting melts the candy, and the other setting keeps it warm. With the plastic handle and silicone material, it is safe to use and easy to clean. Plus, you can use this for fondue!
  • Candy melts can be too thick if you purely melt them, so you can use the Wilton EZ Thinner or add shortening to your melt. With the Wilton EZ Thinner, they recommend 2 tablespoons of the Thinner for every 12 ounces of candy melt, but I found that 1.5 tablespoons was perfect. The candy was thin enough to dip, but didn’t slide off the cake.
  • It is key to refrigerate the cake balls for at least one hour before dipping them into the candy melt because they will fall off the sticks (but cake balls are good too!).

So now, I bring you the recipe and steps for construction of the cake pops.

Happy baking!

Xoxo,
JJC

Recipe, yield 16 cake pops.

Cake
2/3 cup all purpose flour
1/8  cup unsweetened cocoa powder
1/2 teaspoon baking powder
1/2 teaspoon baking soda
Pinch of salt
1/2  cup buttermilk
1/2 teaspoon vanilla extract
1/4 cup sugar
1/4 cup unsalted butter (1 /2 stick)
1 egg
(Optional: you can add some coffee extract to your liquids to make it a little bitter/dark tasting 🙂 )

1. In a small bowl, whisk together the flour, cocoa powder, baking powder, baking soda, and salt.
2. In a measuring cup, combine the buttermilk and vanilla extract.
3. In a large bowl, cream the butter and sugar until light and fluffy.
4. Add the egg to the butter and mix.
5. Add the flour mixture and the liquids alternately, beating well after each addition. Consistency should be similar to a pudding.
6. Pour the batter into a cake pan (doesn’t matter the size).
7. Bake at 325F for until a toothpick comes out clean. For a 9-inch cake pan, bake approximately 15-17 minutes. For a 6-inch cake pan, bake approximately 20-22 minutes.

Frosting
1/4 cup unsalted butter (1/2 stick)
1/2 teaspoon vanilla extract
2 tablespoons cream (or Half & Half)
2 cups confectioner’s sugar
1/8 cup unsweetened cocoa powder

1. Whip the butter until it is light and fluffy.
2. Mix in the liquids and confectioner’s sugar until it is at a desired consistency.

DSC_1560.jpg

Construction
1. Bake cake and let it completely cool. Using a pastry blender, mash the cake.
2. Mix in the frosting and blend using the pasty blender. The cake should begin to gel together.
3. Roll the cake mixture into balls, with about a 1 inch diameter. I used a tablespoon to measure and made 16 cake pops. You don’t want to make them TOO big or heavy, since they have to sit on the lollipop stick.
4. Refrigerate the balls for at least one hour, until they harden.
5. Melt the candy melt. If it is too thick, you can add the EZ Thinner or shortening.
6. Stick the lollipop sticks in the cake balls and dip in the melted candy. Decorate them before the candy hardens!
7. Place your completed cake pops on a styrofoam board and show them off to the world! Enjoy!

DSC_1576.jpg

Orange Checkerboard Cake

DSC_1555

Would you look at that? It’s the end of May. And that means, that 1) temperatures are starting to heat up, and 2) it’s my mother’s birthday. As usual, I was tasked with making the birthday cake. So, naturally, I was going to pick something that I liked…er, I mean, something that mom likes. I thought it would be nice to make a fruity and light cake, since it is beginning to feel like summer. I’ve also been obsessed with checkerboard cakes. Although oranges aren’t quite in season, I remembered that I had one more in the refrigerator and how well the orange chocolate cupcake were from a few months ago, and decided to adapt that recipe.

I’ve now made the checkerboard cake a few times, and I have definitely improved every time (there is less yelling at the cake to tell it to hold together 🙂 ). You can either use a special pan that has dividers and pour the batter, alternating the batter. However, I like to make two separate cakes, and then cut the cakes into rings to alternate it. You use frosting to glue the cakes together, giving it a clean look.

I love baking because it’s truly the intersection of art and science. I still have yet to invest in cookie cutter rings, where you can simply press down to create the rings. Instead, I’m sticking to a homemade engineered way of using a ruler anchored down by a straw as a protractor and cutting around in a circle. The key is patience and a steady hand. That, and well, ensuring that your cake has completely cooled and settled; otherwise, every cut will end in a crumbly mess on the ground with ants invading. Ok, sorry, that escalated quickly. Moving on…

My mom said that she enjoyed this cake, as it wasn’t too sweet. Of course, you can always add more sugar to your tasting. She liked that I used orange juice in the frosting instead of cream and vanilla. This gave the cake a more natural taste instead of an orange creamsicle flavor (which sounds tasty nonetheless). I really don’t like to use food coloring and opted out of adding it to the orange frosting. The only added color was to the lettering ‘Happy birthday mama,’ which I used a dash of grenadine.

Happy baking!

Xoxo,
JJC

DSC_1550

DSC_1554

Recipe

Making the Cakes

Ingredients for 1 9-inch vanilla cake
1 1/2 cup all-purpose flour
1 teaspoon baking powder
1 teaspoon baking soda
1/4 teaspoon salt
1 cup buttermilk
1 teaspoon of vanilla extract
1/2 cup butter (1 stick), room temperature
3/4 cup sugar
2 eggs

Ingredients for 1 9-inch chocolate cake
1 1/4 cup all-purpose flour
1/4 cup unsweetened cocoa powder
1 teaspoon baking powder
1 teaspoon baking soda
1/4 teaspoon salt
1 cup of buttermilk
1 teaspoon of vanilla extract
1/2 cup of butter (1 stick), room temperature
3/4 cup of sugar
2 eggs

1. In a small bowl, whisk together the flour, baking powder, baking soda, and salt (plus cocoa powder for the chocolate cake)
2. In a measuring cup, combine the buttermilk and vanilla extract.
3. In a large bowl, cream the butter and sugar until light and fluffy.
4. Add the eggs to the mixture one at a time.
5. Add the flour mixture and the liquids alternately, beating well after each addition. Consistency should be similar to a pudding.
6. Spray two 9 inch cake pans with cooking spray and pour in the batter
7. Bake the cakes at 350F for about 30 minutes or until a toothpick comes out clean.

*Let cakes stand until cool, at least 2 hours*

When the cakes are nearly cool, make the frosting. I made 2 frostings–vanilla and orange. I used the vanilla as the ‘glue,’ and frosted the outside using the orange.

Vanilla Frosting
1/2 cup unsalted butter (1 stick)
1 teaspoon vanilla extract
1/4 cup cream
3-4 cups confectioner’s sugar

Orange Frosting
1/2 cup unsalted butter (1 stick)
1 teaspoon orange extract
1/4 cup fresh orange juice
3-4 cups confectioner’s sugar

1. Whip the butter until it is light and fluffy.
2. Mix in the liquids and confectioner’s sugar until it is at a desired consistency.

DSC_1548

Construction of the Cake
1. Using cookie cutters, create rings in the cake.
2. Take the outer ring, and frost the inside of that ring.
3. Take the second smallest ring of the other flavor, and insert it into the first ring.
4. Continue until you are at the center.
5. Frost the top of the first cake.
6. Repeat to create the second layer of the cake.
7. Put the second layer on top of the frosted layer.
8. Frost the outside of the cake and decorate!

DSC_1549

Shirley Temple Cupcakes

DSC_1541
Greetings!

Happy (almost) summer! The last time I posted, there were mounds of snow everywhere, but now I am happy to report that there is not a single flake of snow on the ground. Therefore, it’s time for a summer-y post!

That means it’s time for Shirley Temple cupcakes! Who doesn’t love grenadine syrup in a lemon-lime soda? Yum! For my interpretation, I made a lemon lime base with a grenadine buttercream.

Xoxo,
JJC

Recipe
Cake, yield 12
1 1/2 cup of all-purpose flour
1 1/4 teaspoons baking powder
1/4 teaspoon salt
3/4 cup of buttermilk
1/4 cup Sprite or Ginger Ale
1 teaspoon of vanilla extract
1 teaspoon lime juice
1 teaspoon lemon juice
1/2 cup of butter, room temperature
3/4 cup of sugar
2 eggs

1. In a small bowl, whisk together the flour, baking powder, baking soda, and salt.
2. In a measuring cup, combine the buttermilk, vanilla extract, Sprite, lime juice, and lemon juice.
3. In a large bowl, cream the butter and sugar until light and fluffy.
4. Add the eggs to the mixture one at a time.
5. Add the flour mixture and the liquids alternately, beating well after each addition. Consistency should be similar to a pudding.
6. Fill cupcake liners about 2/3 full.
7. Bake at 325F for about 17-20 minutes or until a toothpick comes out clean.

DSC_1529

Lime Grenadine Buttercream Frosting
3/4 cup unsalted butter (1½ stick)
1 teaspoon vanilla
2-3 cups confectioner’s sugar
4 tablespoons cream
2 tablespoons grenadine
1 teaspoon lime juice.

1. Whip the butter until it is light and fluffy.
2. Mix in the liquids and confectioner’s sugar until it is at a desired consistency.
3. Frost cupcakes and decorate.
4. Enjoy!

DSC_1537

Irish Car Bomb Cupcakes Part II

DSC_1532

Happy St. Patrick’s Day! Today we have an Irish Car Bomb themed cupcake. What does this adaptation mean exactly? Glad you asked. We have a chocolate Guinness base with an Irish Cream butter cream. Oop, my past few posts have had Irish Cream. Can you blame me? It tastes great…

This recipe is actually blast from the past. I made a batch of Irish Car Bomb Cupcakes for two years ago. Hence, we have Part II of the Irish Car Bomb cupcakes. This recipe will always have a special place in my heart, since it’s when I really fell in love with the art AND science of baking. I love that baking is an art in that you can create whatever your heart so desires. But that creativity is a double edged sword. It still requires some precision; otherwise your cake will simply flop over.

Through blogging, it is truly incredible record the progress I’ve made over the past few years. At first, I strictly followed recipes to the bone to try to understand exactly how to make a certain cake. Now, I kind of just threw together what I thought would make a good, scrumptious cake. Talk about #transformationTuesday.

March 2013

DSC_1527

March 2015


Similar to the first time, I used an apple corer to hollow the center. The only difference is that I filled it with the Irish Cream filling instead of a Jameson chocolate ganache, since I didn’t have any Jameson. The Irish Cream filling worked just as nicely. I used a little less sugar, which made the cake a little darker, and sweet butter cream provided the perfect amount of sweetness to dark Guinness cake.

DSC_1525Lastly, happy baking and enjoy! Happy St. Patrick’s Day!

Xo,
JJC

DSC_1536

Recipe

Guinness Chocolate Cake, yield 14
1 ¼ cups all purpose flour
½ cup unsweetened cocoa powder
1 teaspoon baking powder
½ teaspoon baking soda
¼ teaspoon salt
½ cup buttermilk
1 cup Guinness Draught
1 teaspoon vanilla extract
1 cup sugar
½ cup unsalted butter (1 stick)
2 eggs

1. In a small bowl, whisk together the flour, cocoa powder, baking powder, baking soda, and salt.
2. In a measuring cup, combine the buttermilk, vanilla extract, and Guinness.
3. In a large bowl, cream the butter and sugar until light and fluffy.
4. Add the eggs to the mixture one at a time.
5. Add the flour mixture and the liquids alternately, beating well after each addition. Consistency should be similar to a pudding.
6. Fill cupcake liners about 2/3 full.
7. Bake at 325F for about 17-20 minutes or until a toothpick comes out clean.

Irish Cream Buttercream
Frosting
3/4 cup unsalted butter (1½ stick)
1 teaspoon vanilla
3-4 cups confectioner’s sugar
4 tablespoons Irish Cream
1 dash of salt

1. Whip the butter until it is light and fluffy.
2. Mix in the liquids and confectioner’s sugar until it is at a desired consistency.
3. Frost cupcakes and decorate.
4. Enjoy!

Pi Day Special

Pi Day Special

3.14. I think is my favorite math-related holiday! I mean, given that there aren’t any mathematical plays on cupcakes, Pi Day is the default winner. Plus this year 3.14 at 9:26:53 was particularly special. It only happens once a century! Well, twice, if you’re on AM/PM time; I have my clocks set to military time. I’m done nerding out about math.

Therefore, this pi day, I give you two pies and two recipes! These were the second and third times I’ve made pies. The first was a couple of weeks ago, when I tried making one to practice. Hey, if this date only comes once a century, I have to nail it. And it turns out, pies are so easy to make! Why didn’t I previously try them? I might move to pie making rather than cupcakes. Just kidding…and as a shameless plug: stay tuned for later this week for a St. Patty’s day surprise cupcake!

The pie on the right was a scrumptious Irish Cream double chocolate pie. Oh my gosh, was it a good pie! I started with one simple pie crust and realized that I didn’t really plan it out. What was the filling going to be? In a mad dash, I scoured the internet and my pantry for anything that could potentially resemble a filling. It was pretty amazing to watch the simple ingredients to come together to form a solid, sturdy filling that I would spoon into the pie crust.

The main pie is an apple pie. It’s a classic–need I say more? I’m thinking not. Happy baking!

Xo,
JJC

Irish Cream Double Chocolate Recipe
3/4 cup white sugar
1/4 cup unsweetened cocoa powder
1/3 cup all-purpose flour
2 cups milk
2 ounces unsweetened chocolate
3 egg yolks
2 tablespoons butter
1 teaspoon vanilla extract
Irish Cream, to taste

1. Combine the milk, vanilla, sugar, cocoa powder, flour, and salt in a medium sauce pan. Stir over medium heat for about 3 minutes.
2. Stir in the egg yolk until the mixtures just barely comes to a boil.
3. Remove from heat and stir in the butter and Irish Cream.
4. Pour the pudding into the pie crust and place in the fridge to chill for 4 hours uncovered.

Apple Pie Recipe

DSC_1527

Pie Crust (yield 2)

3 cups all-purpose flour
1/4 teaspoon salt
2 teaspoons granulated sugar
16 tablespoons cold unsalted butter (2 sticks), cut into small pieces
8-9 tablespoons ice water

1. Combine flour and salt in large bowl
2. Using a pastry blender, cut in butter until mixture resembles coarse crumbs.
Note: after the butter is cut, you may want to use your (clean) fingers to make sure it’s mixed well.
3. Stir in enough water with fork just until flour is moistened.

Divide dough in half; shape each half into ball. Flatten slightly. Wrap 1 ball in plastic food wrap; refrigerate.

Apple Filing
6 cups thinly sliced, peeled apples (6 medium)
¾ cup sugar
2 tablespoons all-purpose flour
1 teaspoon ground cinnamon
¼ teaspoon salt
1/8 teaspoon ground nutmeg
1 tablespoon lemon juice

1. Heat oven to 425°F. Place 1 pie crust in 9-inch glass pie pan. Press firmly crust against the pan
2. In a large bowl, gently mix the ingredients; spoon into crust-lined pie plate.
3. Top with second crust. Wrap excess top crust under bottom crust edge, pressing edges together to seal. Cut slits or shapes in several places in top crust.
4. Bake for 40 to 45 minutes or until apples are tender and crust is golden brown. Cover edge of crust with 2- to 3-inch wide strips of tin foil after first 15 to 20 minutes of baking to prevent excessive browning.

DSC_1526

Irish Cream Hot Cocoa – Easy Recipe!

DSC_1527

But I thought this was a cupcake blog, you say? In my defense, my favorite mug does have a cupcake on it.

Oh snow, we meet again. From the three large storms that have dumped over six feet of snow in New England, I’ve developed a serious case of cabin fever. I read Tim Geithner’s Stress Test: Reflections on Financial Crises, made more cupcakes than I can eat, and watched too many episodes of 30 Rock. The only thing I haven’t done is blogged about some phenomenal homemade hot cocoa.

I first thought of making homemade hot cocoa when I wanted hot cocoa but didn’t want to go to the store to get some. I found some overly complicated recipes online and others that took hours to make (though I hear making hot cocoa in a crock pot is delicious). I was looking for a quick and simple one serving recipe. It took a few tries to get the perfect ratio of sugar to unsweetened cocoa powder, but now I think I have perfected the easy-to-make-hot-cocoa.

This recipe is not only simple, but it is sure to be a crowd-pleaser. It’s rich, but not too sweet. Of course, you can add more sugar, depending on your preference. The friends that I have made it for all said they loved it. And I swear it wasn’t because a slip of hand on the Irish Cream.* 😉

Well, here is the recipe!

Xoxo
-JJC

Recipe, yield 1 serving

2 tablespoons unsweetened cocoa power
1 1/2 tablespoon granulated sugar
1 cup milk
1/2 oz vanilla extract
1 oz Irish Cream

1. In a small bowl, whisk together the sugar and cocoa powder.
2. In a saucepan over medium heat, add the milk, vanilla, and sweetened cocoa mix.
3. Whisk the mixture until the milk is JUST about to boil.
4. Pour hot cocoa and Irish Cream into your favorite mug.
5. Enjoy! Preferably with a good book or with the company of good friends.

* If you do not want to add Irish Cream, add a bit more sugar so the ratio of unsweetened cocoa powder to sugar is 1:1.

Chocolate Orange Cupcakes

Orange Chocolate Cupcake

Greetings! Two posts in two days? Yup! I need to somehow make up for not posting in nearly a year. That, or it might be the dreary February weather of New England. Three storms, including two blizzards, 4+ feet of snow, and more on the way. I’ll be staying in, baking tons of desserts, and blogging about them.

I spent the morning thinking of what flavor I should try next and what I had in my pantry. One thing that I love is Terry’s Chocolate Oranges. So, why not try a chocolate orange cupcake? I absolutely loved this recipe and wish I could continue eating all of the cake I made without feeling guilty of half a dozen cupcakes (I halved the recipe listed below). This recipe is not that much different from a normal chocolate cake recipe, but the added coffee and orange extract made it 1000 times better than “plain” chocolate cake. Adding the coffee is optional, but I prefer a darker tasting chocolate.

The only challenge with this recipe was the frosting. The frosting that I made was an orange vanilla buttercream. Orange extract by itself does not smell, let alone taste, that great. When mixing it with vanilla extract, the frosting begins to smell like an artificial orange creamsicle. Spoiler alert: I added a few teaspoons of freshly squeezed orange juice, which helped eliminate the creamsicle taste.

Without further ado, here’s the recipe!

Happy baking!
–JJC

RECIPE

Cake
1 ¼ cups all purpose flour
½ cup unsweetened cocoa powder
1 teaspoon baking powder
½ teaspoon baking soda
¼ teaspoon salt
1 cup buttermilk
1 teaspoon vanilla extract
1 teaspoon orange extract
1 tablespoon brewed coffee
1 cup sugar
½ cup unsalted butter (1 stick)
2 eggs

1. In a small bowl, whisk together the flour, cocoa powder, baking powder, baking soda, and salt.
2. In a measuring cup, combine the buttermilk, vanilla extract, orange extract, and coffee.
3. In a large bowl, cream the butter and sugar until light and fluffy.
4. Add the eggs to the mixture one at a time.
5. Add the flour mixture and the liquids alternately, beating well after each addition. Consistency should be similar to a pudding.
6. Fill cupcake liners about 2/3 full.
7. Bake at 325F for about 17-20 minutes or until a toothpick comes out clean.

Batter

Frosting
3/4 cup unsalted butter (1½ stick)
1 teaspoon vanilla
1 teaspoon orange extract
¼ cup milk/cream
3-4 cups confectioner’s sugar
A dash of fresh orange juice

1. Whip the butter until it is light and fluffy.
2. Mix in the liquids and confectioner’s sugar until it is at a desired consistency.
3. Frost cupcakes and decorate.
4. Enjoy!

DSC_1508

Vanilla Glazed Donut Holes

Glazed Vanilla Donut Holes

And we’re back! Well, kind of. Today’s post, and the first of 2015, sorry I’ve been slackin’, is not of cupcakes, but of glazed donut holes! Why, you may ask? I recently got Rachael Ray’s mini muffin tray and have been obsessed with making all things mini. Plus, they’re adorable. I also have been craving donuts since having an embarrassingly long conversation about donuts. Side note: thanks Massachusetts for having a Dunkin’ Donuts on every corner to satisfy the desire for donut. I’ve eaten too many in the past week. This is the real reason why I run. Anyway, I digress…

Since I’ve never made donuts/donut holes before, I took a recipe from the Interwebs. But of course, by “took,” I really mean that I started with one and then changed it until it a bit. This recipe is pretty easy to make and is great for if you are hosting people. Bite-sized sweet treats? What could be better?

Now a few tips for making donut holes. ie: the lessons learned:
– The batter is pretty thick and sticky when you try to scoop them into the muffin tin. Try to roll the batter into balls so the donuts actually are round.
– Start making the glaze with 5 minutes left of baking. This allows the glaze to thicken but also remain liquid when you dip the cake.
– Definitely use tongs (or in my case chopsticks) when dipping the cake into the glaze. It’s hot.
– Other tips? Feel free to share! I promise also for more cupcakes in the near future! Yum!

Happy baking!
— JJC

RECIPE

DSC_1493

Cake

⅓ cup (5 Tablespoons) unsalted butter, softened to room temperature
½ cup granulated sugar
1 large egg
1 teaspoon vanilla extract
1/2 cup milk
1½ cups all-purpose flour
1½ teaspoon baking powder
¼ teaspoon salt

1. Preheat oven to 400F. Spray mini muffin pan with cooking spray and set aside.
2. In a large bowl, cream 1/3 cup butter and granulated sugar together on medium speed. Mix in the egg, vanilla extract, and milk. Gently stir in flour, baking powder, cinnamon, and salt by hand. DO NOT overmix, or the donuts will be too dense.
3. Spoon batter into prepared muffin tin – about 2/3 of the way full (It helps if you use two spoons to shape the into balls)
4. Bake for 10-12 minutes at 400F.

With about 5 minutes left, start the vanilla glaze.

Vanilla Glaze

VANILLA GLAZE

2 tablespoons milk
½ teaspoon pure vanilla extract
1 cup confectioners sugar

1. Add milk, vanilla and confectioners sugar to a small saucepan
2. Heat over low-medium heat, constantly stir just until all is well combined.
3. Dip the doughnuts into the glaze, one at a time and transfer to cooling rack.

Glazed Donut Holes